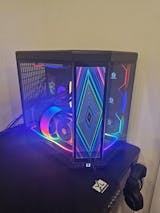
When you want to squeeze as much performance as you possibly can from the existing components in your PC, we can help. XOTIC PC provides more than 20 years of industry experience and the know-how to help you get started. Get the most out of your gaming experience by giving your graphics processing unit (GPU) the update it deserves. In this guide, we explain how to overclock your GPU. By overclocking your graphics processor, you can avoid spending hundreds or thousands of dollars on newer, faster parts.
Why Should I Overclock My GPU?
Overclocking can seem daunting to the new PC gaming enthusiast, but it is easier than you might think. Some games require at least 30 to 40 FPS for average yet playable gameplay, but anything less than 30 FPS will result in a limited gaming experience. By overclocking your GPU, you can ultimately reduce stuttering and improve your PC’s ability to weather intense action or demanding graphics. Although overclocking can still be dangerous to your computer if you don’t increase the stock settings incrementally and monitor temperatures, it is much less hazardous to the health of your PC components than it used to be. Overclocking will likely void any warranty, so proceed with caution.
How to Overclock Your GPU
- Ensure that your PC is completely up to date and download the latest drivers for your aging graphics card. Next, you need to download an overclocking software. There are a variety of programs available to you, including MSI Afterburner, AMD Overdrive, EVGA Precision X, GPU-Z, and many more. There are also a variety of benchmark applications you can use perform rendering and stress tests.
- Gather your baseline performance numbers to determine how your PC currently performs. Run a favorite game with a built-in benchmark and run a stress test at current settings. Take note of the average and minimum frame rate scores, as well as the native resolution.
- Boot up both your overclocking software and benchmarking application. One of the best places to start is with the memory clocks. Change the memory settings in 5 – 10MHz increments and apply a boost each time you change. As you experiment with frequencies, keep a close eye on visual artifacts. It’s time to dial back when you see solid blocks, blobs of colors, or stars – all signs of failing memory. Check the stability in your benchmarking program. If you start to see artifacts, dial the setting back by 5 – 10MHz and test again.
- Increase power limit settings to maximum and the temperature a little to account for extra heat generation. Adjust the clock speed by 5 – 10MHz at a time while checking for artifacts, such as pixel-sized dots, shards of color, full-screen flashes. If you see these telltale signs, dial back the clock speed and try again.
- Determine how your GPU and memory clocks perform at peak levels. If your system crashes, simply reboot and reset both the memory and GPU speeds to test again. Once you feel confident about the maximum levels you’ve discovered, it’s time to stress test.
- Close and restart your benchmarking application at the native resolution and let it loop for about 10 minutes to see whether it is stable at the new settings. Benchmark and determine what improvements in performance you have to look forward to. Replicate your earlier gaming and benchmark tests to experience any gains.
Overclocking is a great way to boost GPU performance and achieve smoother gameplay, but not all graphics cards will benefit from improvements. Alternatively, you can invest in a cooling system to enjoy what time you have left with your aging GPU. Remember that overclocking requires patience and vigilance, but it is all worth it in the end.


